• Home
  • Beauty
  • Fashion
  • Makeup
  • Review
  • About
  • Contact

DHAWANSHI


Hi guys! I have been planning this blog post for the longest time. After lots of brainstorming and going through several inspirational posts this post looks just the way I wanted it to look like.
Audrey Hepburn is a huge inspiration to me not only with regards to her make up or sense of styling but also her personality and her ideas.

So here’s a tutorial on a makeup look that is inspired by Audrey Hepburn. You can make it an everyday look too as its easy and doesn’t use too many products or consume too much of time.

The first step is to use a primer. Many people skip this step but believe me it makes a lot of difference. It prevents your makeup from wearing out quickly. The second step is to apply loose powder to get a "flawless foundation" look. It helps your base stay matte for longer period and prevents your makeup from creasing. Just apply your powder normally. The primer and loose powder that I use are from Bharat and Doris.
Primer and Powder that I use
The next step is concealer followed by foundation. I use the NYX Above & Beyond full coverage concealer and Maybelline Fit Me foundation in the shade 230. Use concealer to hide away your blemishes or any other imperfections. You can apply it under your eyes to get a highlighted effect too. You can blend it with your fingers or use a beauty blender to do the same. 


The foundation I use has a medium to high coverage and doesn’t feel heavy on my skin which I love and is also probably the only quality I look for in a foundation. It is also a pore less foundation which means it won’t clog my pores. I use a beauty blender to apply my foundation as it is much easier and helps me blend well. The trick to prevent your foundation from settling in your creases is to blend your foundation thoroughly and I mean thoroughly. You should spend at least about 6-7 minutes just to blend that foundation in to get a natural looking skin. This should not give you oily skin after many ours of applying it too.


The final step to your base makeup for this look is baking. Yes I bake my face. For those of you who don’t know what baking your face means: it is a method where you apply loose powder specifically, not any other powder ONLY loose powder on your face in the areas which tend to get oily and the ones that need to be highlighted. This helps your face stay matte for longer times. You might feel that this is a routine for heavy makeup but trust me it is not. It works wonders and will let your makeup last longer. “Wipe” the powder using a soft face brush after at least 3-4 minutes so it gets time to settle well and in the mean time you can do your eyebrows which actually brings us to our next step.


Audrey Hepburn has very thick eyebrows that are filled all the way. You can however do them the way you like. Maybe fill in the gaps, give them a different shape or stick to your routine method. It’s all up to you. I filled in the gaps of my brows using MAC’s Carbon eyeshadow which is completely matte and the shade matches perfectly to my brows.


For blush I used the MAC cream blend blush in “Special Something”. Apply it to the apples of your cheek and swipe it up towards your cheek bone. Don’t use too much of a blush as Audrey had slight pink on her cheeks. Use it just to give a natural colour to your cheeks. We will not be contouring our face as no one really contoured their faces during those times hence we don’t need to give any specific kind of dimension to our faces. This is one of the reasons why this look can be a part of your daily makeup routine. Contouring requires perfection and consumes quite some time hence you can do a quick look while you’re on the go.


After Baking, doing my brows and blush.
Before applying my eyeshadow I used my Urban Decay eyeshadow primer so that the shadow stays on all day. For my base shadow I applied a mixture of the 3rd and the 5th shade from my Maybelline The Blushed Nudes eyeshadow palette. These are more shiny nude shades.


Later I applied some darker shades that are shade 7 and 10 from Maybelline’s the Nudes palette in the crease and the outer corner of my eyes. This helps countour my eyes.


This eye look can basically double as a cut crease look. Make sure you blend the crease shadow with the lid shadow really well using a blending brush. Next to finish with the eyeshadow I took the same blending brush I earlier and applied a little bit of MAC’s Embark eyeshadow a bit over my crease and blended it well.
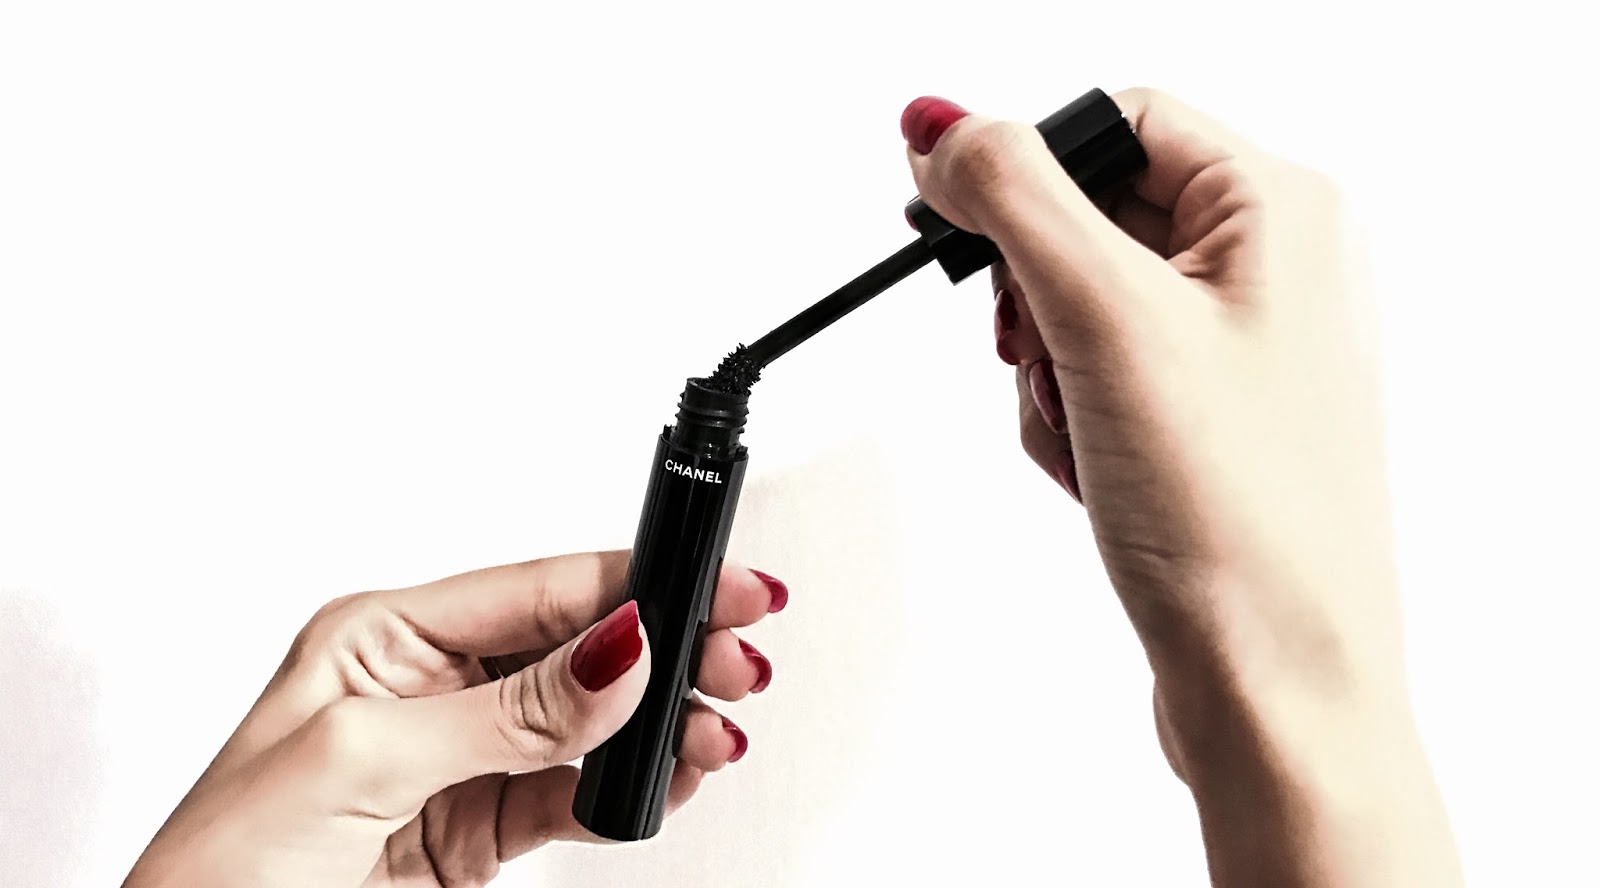

To finish it all up I added a thin winged eyeliner with a small wing and curled my lashes using the eyelash curler and applied Benefit’s Roller lash  mascara (to make my lashes longer) followed by Chanel’s Le Volume de Chanel Mascara (to give some volume to my lashes). You can even apply some false lashes but I suck at doing that so I didn’t even try it.


The eyeliner I used is from Stilla Cosmetics
 Also since Audrey had really big eyes and if you have small eyes you can try to “open them up” by applying a nude shaded pencil such as the NYX Wonder Pencil on your waterline. This is totally an optional step.


To finish up the whole look I wore my favourite lipstick from Bobbi Brown in the shade Soft Rose. It’s a nude pink colour. You would see Audrey either in such nude pink shades or a signature bright red lipstick. Since I was going for more of an everyday look I decided on using this lipstick rather than the bright red lipstick. But to be honest, you can use any shade of lipstick with this look. All of them will look just as good and pop out from the rest of the make up.


So here it is the end of this make up tutorial. Hope you liked it and would love to try it. If you’re reading this thank you for reading the whole post I really appreciate it.

See you soon!
Share
Tweet
Pin
Share
No comments
Lipstick is one of the most important beauty product for me. It changes your whole look. There are times when I feel lazy to do my makeup and all i have to do is wear a single coat of lipstick  and I'm ready for the day/event. Just as they say "on a bad day there's always lipstick". Today I share my 3 favourite lipsticks.


Mehr - MAC
This is the first MAC lipstick I bought. I like any kind of nude lipstick to any shade of the millennial pink. This shade is in between leaning more towards the pink side. It is a matte lipstick but the formula doesn't dry out your lips like the liquid lipsticks. That is why I prefer such matte lipsticks over liquid lipsticks.

Soft Rose - Bobbi Brown
This the first ever high end lipstick that I had ever bought in my life. I immediately fell in love with this shade and knew I had to buy it no matter what. I love pink shades but a specific kind of pink shade which I never found until this one. Its like a dull pink shade and it has a satin finish to it. Whenever I try out any pink shade they always end up looking bright on my slightly dark lips which is a deal breaker. I don't like bright lipsticks as they look weird and make my lips look bigger than they already are. This is the perfect pink shade and I'm happy to find it finally.

Whirl - MAC
Saving the best for the last. This is my absolute favourite lipstick shade in the world. It is the perfect kind of nude that I've always wanted. It perfectly suits my slightly dark lips and also complements with my skin tone. It has a slight pink undertone to it which I love. Again this is a matte one like Mehr. I also have a lip pencil in the same shade Whirl from MAC which makes the lipstick application easier and less messy.

So those are my 3 favourite lipsticks!
See you soon!
Share
Tweet
Pin
Share
No comments

Recently I had been on a vacation to South Africa and I bought some stuff from the duty free shops at the airport so I thought what’s better than doing a haul about it? Here are all of my recent purchases that include some make up and beauty products. Hope you all enjoy it.

  • NARS Pressed Powder in the shade “valley”


I had bought this pressed powder at the Dubai duty free shop  for $35. Now I know this is a few shades darker than my skin but I am planning to use it as a bronzer. I could’ve bought the actual bronzer but first of all I wanted to buy a NARS product and secondly the bronzer they have has shimmer in it which I absolutely dislike. Hopefully this works.

  • Urban Decay Eyeshadow Primer Potion in “Original”

I’ve always wanted this eyeshadow primer and  was finally able to buy it after many years of waiting. I love trying out different eye looks and hate it when the eyeshadow wears off after few hours. I bought this from the Dubai duty free for $22. I’m so excited to use this product I could burst.

  • The “Eau Vive” perfume from Chance collection by Chanel

This was the only thing that I bought from the Johannesburg duty free. It was one of my most anticipated purchases too. I am in love with its scent. I’m bad at describing scents so click the links below to get a more vivid description about the way it smells.
·             https://www.fragrantica.com/perfume/Chanel/Chance-Eau-Vive-30796.html
·             http://www.frontrowbeauty.com/chanel-chance-eau-vive-review/

  • Charcoal face mask from Propshop24.com


This is the only item I bought from India. I had actually ordered it a few days before my trip from propshop24.com but got it just a day before I landed here and so I thought of including this too in my haul. This is not a peel off charcoal face mask. You have to keep it on for a few minutes and then rinse it off with water. I have quite a few pores on my skin and hence to clear them out I thought of trying out this charcoal face mask. The link to buy it is here.
Share
Tweet
Pin
Share
2 comments

First of all I promise that this is not a review blog. I am not able to plan and post variety of stuff because of  my schedule and a lack of confidence. Besides reviews are a lot easier to post as they don't require much brainstorming or even photoshop :P Anyways moving on to the review.


Can I just say how visually pleasing this highlighter looks? This is the most beautiful piece of make up that I own or will ever own. It feels like I have found a rare gem.

P.S. Sorry for the poorly done swatch I was tired.

The highlighter is given the shape of Chanel's iconic symbol - the camellia flower. This is a limited edition highlighter that is packed in a red Les Beige case. It has a velvety texture, and the extremely fine powder gives a natural glow as the powder itself is neither too warm or silvery also making it suitable for all skin tones.


The highlighter stays on for long period. It does not feel heavy or give an unnatural glow even when you apply more. This highlighter is meant for a natural everyday glow. Since the highlighter has a slight creamy texture to it, it doesn't apply well with a brush. However it looks just as good when applied using the fingers. More over this is a trait of a French brand. They believe in natural looks and the mantra "Less is more".

Overall I'm really happy with my purchase and would recommend it only if you're willing to spend over five thousand bucks for a product.

I bought this highlighter at the Chanel store in Palladium Mall, Lower Parel.
Share
Tweet
Pin
Share
No comments

I had been hunting for a rose gold eyeshadow for the longest time. Finding this one was a jackpot since I got 12 different shades instead of one. This was my time to shine and make endless looks with this one eyeshadow palette.

The best thing about this palette is the price. In India you can get it off from nykaa.com for Rs.899. I don’t know about the Maybelline counters though. I’ve never seen it there like many other products.

Starting off with the way it looks. Can we just take a moment of silence for the colour of this palette? It’s pink and it is so freaking beautiful. The colour of this palette itself swept me off my feet. Moving on to the size, it’s the perfect size. Not too big, not too small, just perfect enough that you can even fit it inside your bag.


The palette comes with 12 unique shades to give everything from a go to everyday look to a smoky eye look. It also comes with an applicator which I find very un-useful but I keep just it in case. Always keep the applicators, never throw them. You never know when you might need one.

About the product the top four shades are sheer and you might need to apply a few coats to actually show the colour. However you mainly need them for applying as a base so it does not make much of a difference. You can in fact use the middle four shades as a highlighter too.


The lower few shades help intensify your look. They’re more pigmented than the top shades hence you can use them to contour the crease. The fourth shade from the bottom line is the only matte shade in the whole palette thus if you’re looking for matte colours this palette is not for you.


Also I’ve read many reviews and comments about people pointing out that the shades in this palette are not meant for darker skin tone. It is not at all true. It depends upon the look you’re going for and in what part of the eye your shade is going. Specific shades for specific skin colour is a total myth, you have to be creative and know how and where to use the shade.

Beginners, if you’re looking for a good but affordable palette, this one’s for you. You can create endless looks with this palette for all kinds of occasions. The back of the palette provides a guide to different looks that you can create with this palette. The only thing I did not like about this palette is that the shades are not named and so it becomes difficult for me to to keep track of which the shade that I'm using. You feel me? I hope you do cause it’ll be extremely embarrassing otherwise.

Anyways I hope this review was helpful. You can buy the palette from nykaa.com for Rs. 899.
Share
Tweet
Pin
Share
No comments

The good news is that this is a lazy girl night routine. Being lazy and also having tonnes of acne can be a pain in the butt hence I came up with this three step routine which you can follow every night before going to bed. 

The products that I use are:

  • The Body Shop tea tree face wash – Rs. 695
  • The Body Shop tea tree oil – Rs. 695 
  • Sephora Moisturizing Body Lotion – Rs. 800

I know that these products are overpriced but I don’t like to compromise the quality of my products when it comes to my face. Also I have tried hundreds of face wash for my stubborn acne and found this one to actually work on my skin however you can use any face wash that suits your skin. About the body lotion that I’m using on my face, I don’t have any facial moisturizer and I’m too lazy to hunt for a good moisturizer therefore here I am embarrassing myself on my blog. You can use any moisturizer that you like. Anyways I present to you this lazy girl approved night routine for acne prone skin.

Step 1


Wash your face thoroughly using the face wash. Make sure your face has no greasy feel after rinsing. Not keeping your face clean is one of the causes of acne as it provides suitable conditions for bacteria to grow. This is a key step to get good results.

Step 2


This is the most important step. Take few drops of the tea tree oil using cotton or a cotton swab and press it gently on your pimples. Make sure you do not apply it anywhere else since tea tree oil is used to dry the pimple hence if you apply anywhere else it will end up drying your skin. If you feel the tea tree oil is very strong you can dilute it using coconut oil.

Step 3


As I mentioned above that tea tree oil is used to dry out pimples. It will tend to dry out your skin. Also since we got rid of the natural oils of the face by using face wash it is now time to moisturize your skin. Take some good facial moisturizer and evenly apply it to your face. If you’re feeling extra lazy you can even add a few drops of tea tree oil to your moisturizer and apply the mixture to your face hence skipping the 2nd step.


Note: Do not expect to notice any changes immediately after 2-3 days. It will take few weeks to see visible results. I will however not say that this has given me 100% results but I can surely say that it has reduced my acne by a greater extent and using the moisturizer has in fact made my skin softer. You can never completely get rid of acne without making changes to your diet, but that is a whole new story. Stay tuned if you want to learn more about tips to get rid of acne. Please share and help more lazy fellas out. 
Share
Tweet
Pin
Share
No comments

Truth be told, I'm the biggest mascara fan. I cannot not wear mascara. It is my most favourite make up product. When it is CHANEL that's when my heart starts melting. I have fallen head over heels for Le Volume De CHANEL Mascara. This is the most amazing product, a bit overpriced but I'm willing to make a sacrifice for this wonder product.
The product has the perfect consistancy and applies without making your lashes look deformed. It is not too heavy and also doesn't damage your lashes while removing the product. I wore it the whole day and my lashes were intact looking as if I freshly applied it. Also i didn't feel any burden to get rid of it because it was just so light.

About the wand. Its highly well designed. The holder is not too fancy and i think that's what makes it comfortable while holding and applying it. The best part is that its flexible at the tip which I like the most about this mascara. It helps remove off the excess mascara easily leaving you with just the right amount of product. There are mascaras which don't have a flexible wand and you end up with extra product and it's just too much for your lashes. Making them look clumpy or it ends up elsewhere too. The bristles are the right size and fall at a perfect distance hence depositing not too much or not too little product along with giving the perfect desired volume to your lashes.

To be honest i could not find a single disappointing factor about this mascara. In all a 10/10 for Le Volume De CHANEL Mascara. I'm in love <3

Pro tip: in case you get your mascara elsewhere on your lid. First of all don't panic. Everything happens for a reason. It doesnt mean you don't know how to apply a mascara. Just wait until the product dries of completely which doesn/t take more than a minute. Later gently with a q-tip or a tissue wipe it off. All you need is a minute and patience.
Share
Tweet
Pin
Share
No comments
Newer Posts

Follow My Blog

Follow Me

Labels

Audrey Hepburn Everyday makeup Haul Highlighter MAC acne night routine chanel converse dior hair care nykaa sephora shein wet n wild

Popular Posts

  • Very Real Morning Routine (no make up)
  • How to Maintain Your Skin After Recovering From Acne
  • Duty Free Make Up and Beauty Haul
  • Very Peachy Makeup Look

recent posts

Blog Archive

  • ►  2019 (1)
    • ►  March (1)
  • ►  2018 (18)
    • ►  November (1)
    • ►  September (2)
    • ►  July (1)
    • ►  June (1)
    • ►  May (2)
    • ►  April (2)
    • ►  March (2)
    • ►  February (2)
    • ►  January (5)
  • ▼  2017 (7)
    • ▼  June (2)
      • Audrey Hepburn Inspired Makeup Look
      • My Favourite Liptsicks
    • ►  May (2)
      • Duty Free Make Up and Beauty Haul
      • Review - CAMÉLIA DE CHANEL ILLUMINATING POWDER
    • ►  April (1)
      • Review – Maybelline The Blushed Nudes
    • ►  March (2)
      • Night routine for acne prone skin
      • Review - LE VOLUME DE CHANEL Mascara
FOLLOW ME @DHAWANSHI

Created with by BeautyTemplates | Distributed by Gooyaabi Templates